This section provides information on operating your StorEdge L8 autoloader.
The StorEdge L8 autoloader Operator Panel consists of four LEDs, four buttons, and an LCD screen. The Operator Panel provides everything you need to monitor autoloader status and to control all of its functions.
The display defaults to the Home screen. The Home screen consists of the autoloader status on the top line and the current cartridge inventory on the second line. If the tape drive does not have a cartridge loaded, the top line displays Drive empty (see Figure 1 ).
| NOTE: “SEQ” appears next to the front panel inventory when the autoloader is in Sequential mode. Nothing appears when the autoloader is in Random mode. |
The cartridge inventory indicates all slots that contain a cartridge by displaying the slot number. Empty slots are indicated by a dash (-).
Figure 1 Home Screen, Drive Empty
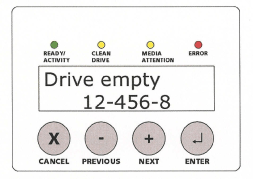
An exclamation point (!) displayed in the inventory indicates that the autoloader has identified a cartridge in the indicated slot that is either an invalid cartridge type or has had a media-related error. These can be caused by faulty media, or dirty read/write heads in the tape drive. The Media Attention LED is also illuminated in this case. See LED Indicators for more information.
Exporting the indicated cartridge will clear the error condition. See Exporting Cartridges. If these symptoms occur on multiple known good cartridges, consider cleaning the tape drive. For more information, see Cleaning the Tape Drive. If a particular cartridge causes these symptoms repeatedly, that cartridge may be defective or invalid.
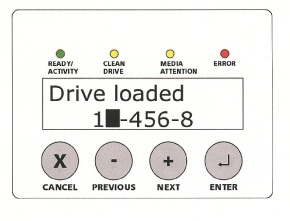
If the tape drive has a cartridge loaded, the top line displays Drive loaded. The cartridge currently loaded in the drive is indicated by an alternating black block and the slot number. This display can also indicate that the specified cartridge is being loaded, unloaded, imported, or exported. The autoloader status line indicates the current operation. An example of this display is shown below.
Figure 2 Home Screen, Drive Loaded
The Operator Panel includes four LED indicators that provide a variety of information as detailed in the following table:
Table 1 LEDs
| LED | Color | Description |
|---|---|---|
| Ready/Activity | Green | Illuminated when power is on. Blinking whenever there is tape drive or autoloader robotics activity. |
| Clean Drive | Amber | Illuminated when the tape drive has determined that a cleaning cartridge should be used (see Cleaning the Tape Drive). Additional cleaning of the tape drive is not necessary. |
| Media Attention | Amber | Illuminated if the tape drive has detected a cartridge or tape fault. Recommended action is to export the cartridge from the autoloader. Doing so turns off the LED (see Exporting Cartridges). If a particular cartridge causes these symptoms repeatedly, that cartridge may be defective. |
| Error | Red | Illuminated if an unrecoverable tape drive or autoloader error occurs. A corresponding error message appears on the LCD screen (see Viewing Autoloader Error Codes). |
The Operator Panel includes four buttons that provide access to all operations and information menus.
Table 2 Control Buttons
| Button | Description |
|---|---|
| Cancel | Cancels the current menu option and returns to the previous menu level or Home screen. |
| Previous | Selects the previous item or value in the currently displayed menu. |
| Next | Selects the next item or value in the currently displayed menu. |
| Enter | Executes the current menu or selects the current option displayed on the LCD panel. |
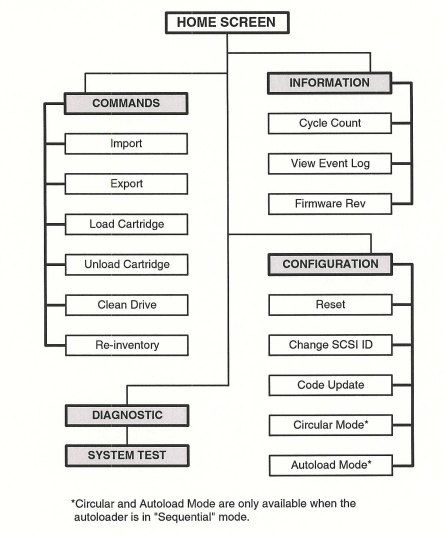
The following graphic depicts the autoloader menu structure.
Figure 3 Operator Panel Menu Structure
The autoloader powers up.
The following describes how to work with your data cartridges. For specific information about allowed autoloader data cartridges, see Technical Specifications.
This option commands the autoloader to import a cartridge into a specific empty slot on the carousel.
 |
CAUTION: Performing an import or export of media during a data backup may result in adverse results, which could include backup failure or other errors. |
You are not given the option to import a cartridge to an occupied slot.
 |
NOTE: If you are using the Operator Panel to clean the drive, import the cleaning cartridge only when the Operator Panel requests it. You may keep a cleaning cartridge in the autoloader if the backup software can manage the drive cleaning. |
This option moves a cartridge from a specific slot to the mail slot.
 |
CAUTION: Performing an import or export of media during a data backup may result in adverse results, which could include backup failure or other errors. |
You are not given the option to export from an empty slot, and you cannot export directly from the drive.
This option loads a cartridge from the autoloader slots into the tape drive.
The slot number you select indicates the cartridge to be loaded into the tape drive.
| NOTE: Only slot numbers that contain cartridges are displayed. |
This option unloads the cartridge from the tape drive into its original slot.
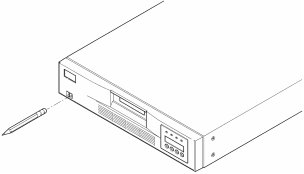
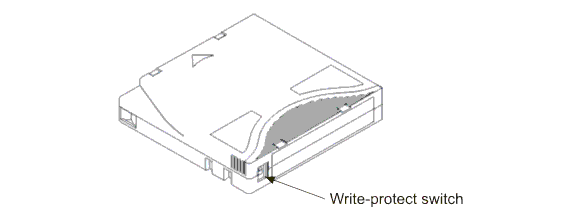
All cartridges have a write-protect switch to prevent accidental erasure or overwriting of data. Before loading a cartridge into the autoloader, make sure the write-protect switch on the front of the cartridge is positioned as desired:
| NOTE: When a write-protected cartridge is loaded into the drive, a WP appears on the bottom line of the LCD screen next to the inventory information. This message appears until the cartridge is unloaded from the drive. |
Figure 4 Write-Protecting a LTO Cartridge
To ensure the longest possible life for all of your cartridges, follow these guidelines:
When the Clean Drive LED is on, the autoloader's tape drive needs to be cleaned. Cleaning times can range from a few seconds to a few minutes during which time the Ready LED blinks. Use only authorized cleaning cartridges in the autoloader.
| NOTE: If you are using the Operator Panel commands to clean the drive, import the cleaning cartridge only after you have selected the Clean Drive command. If you would like to keep a cleaning cartridge in the autoloader, the backup software must manage drive cleaning. |
 |
CAUTION: If the cartridge is not a valid cleaning cartridge, the LCD screen will display Invalid Tape and the cartridge will be exported. |
| NOTE: The Clean Drive or Media Attention LED is illuminated again when you insert another cartridge immediately after cleaning, see Table 1 in the Troubleshooting and Diagnostics section. |
This option analyzes the slots and drives in the autoloader.
The autoloader then checks the drive and each cartridge slot for the presence of a tape in order to update the inventory information.
| NOTE: This command is only needed if the inventory in the autoloader is different than the inventory displayed on the front panel. |