PCI Card Cage
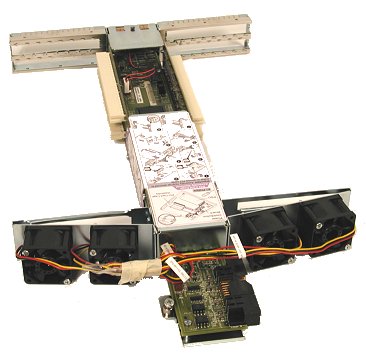
Notes on Installing/Replacing PCI Cards:
- Use #1 Phillips screwdriver to loosen the captive screw holding the
power distribution board in place.
- Slide the power distibution board toward the side of the chassis,
detaching it from the PCI card cage connector.
- Loosen the captive screw holding the PCI card cage.
- Gripping the PCI card cage on the purple service label, push toward the
chassis front to dislodge the card cage.
- Slide the card cage toward the chassis back and lift out of the chassis
at a 45 degree angle.
- Flip the PCI card cage so that the PCI slot side is near the PCI card cage
stabilizer on the right front corner of the chassis.
- Insert the PCI slot side of the card cage under the lip of the PCI card
cage stabilizer to provide stability while installing PCI cards.
- Install PCI-compliant cards into any open slot by guiding the card pins
into the PCI card connectors.
Further Notes:
- If you are installing long PCI cards, it is helpful to insert the left
edge into the card guide located near the fans first. Align the connectors
on the side, and then push down firmly to seat the card.
- PCI cards can be placed in any of the four PCI slots. However, some cards
may require placement in a specific slot because of the need to cable one
card to another. Please refer to your PCI card documentation.
|